Aquascaping Depth: Perspective, Scale & Substrate Slopes
Introduction
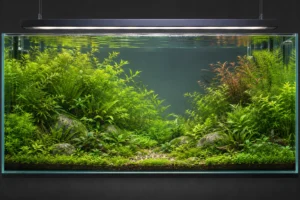
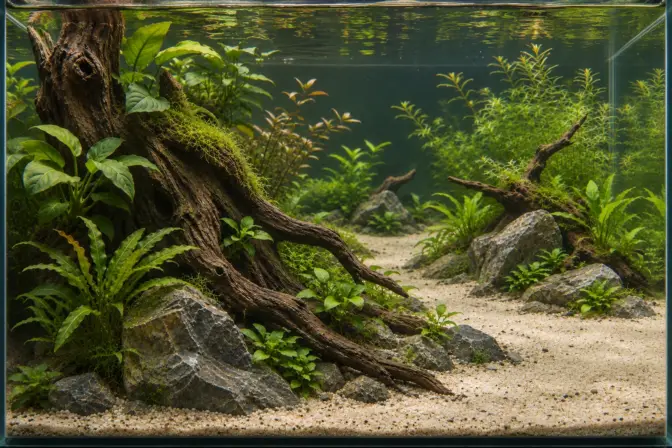
Aquascaping depth is the impression that a layout continues away from the viewer rather than ending in a row of objects against the back glass. You can encourage that impression through overlapping forms, differences in size and texture, visible routes and a viewpoint that reveals the layers you have built.
A steep substrate slope is only one possible part of the design. It will not rescue a foreground that hides everything behind it, and it is not required in every aquascape.
Use these techniques across aquascaping styles to open up a view, separate plant groups or suggest distance. For overall composition, use aquascaping design principles; for the landscape style itself, use our diorama aquascaping guide.
What you’ll learn in this lesson
- How physical depth differs from the impression of distance.
- How eye level and overlapping forms affect what can actually be seen.
- How to coordinate material size, substrate shape, planting and leading lines.
- How to preserve the effect as an aquarium grows and changes.
Separate physical depth, layering and forced perspective
Physical depth is the actual front-to-back space available. Layering is the arrangement of elements at different positions within that space. Forced perspective deliberately changes sizes or relationships to suggest a scene larger or more distant than the aquarium really is.
These are related but not identical. A tank can have considerable physical depth yet look like a flat wall when the front is blocked. A shallow layout can suggest distance through carefully coordinated forms, while still offering limited actual space for plants, animals and equipment.
DOOA demonstrates size contrast and a directional opening in a small aquarium to give the scene a stronger sense of space. Compare the size and spacing of the elements, while keeping the aquarium’s actual swimming space and maintenance access in mind. [1]
You also do not have to aim for a miniature landscape. A planted composition can use layers without pretending that its stones are distant mountains.
Choose the main viewing position first
Decide whether the aquarium is primarily viewed seated, standing or from a particular camera position. Then evaluate the important openings from that position.
A route visible while you stand over the tank can disappear behind a foreground stone when you sit down. Conversely, a low view may emphasize the skyline of the hardscape but hide more of the ground. Neither view is automatically correct. The useful question is which view your design is intended to serve.
If you are building for more than one viewing side, accept that a strongly directional perspective effect may not be equally convincing from all of them. Test those views before attaching plants or fixing the materials together.
For a controlled view, compare the camera-position and distance diagrams in Aquascape Photography. Moving the camera changes perspective; changing focal length from the same position mainly changes framing.
The horizon line is not the waterline
In a basic perspective drawing of level ground, the horizon represents the viewer’s eye level. Parallel lines receding along that ground share vanishing points on that horizon. A real scene can have several vanishing points for different directions; not every branch needs to point toward one dot. [2]
The horizon is a construction guide. It is not automatically the water surface, the back edge of the substrate or the line through all the highest rocks.
Equal-height objects do not have to touch the horizon
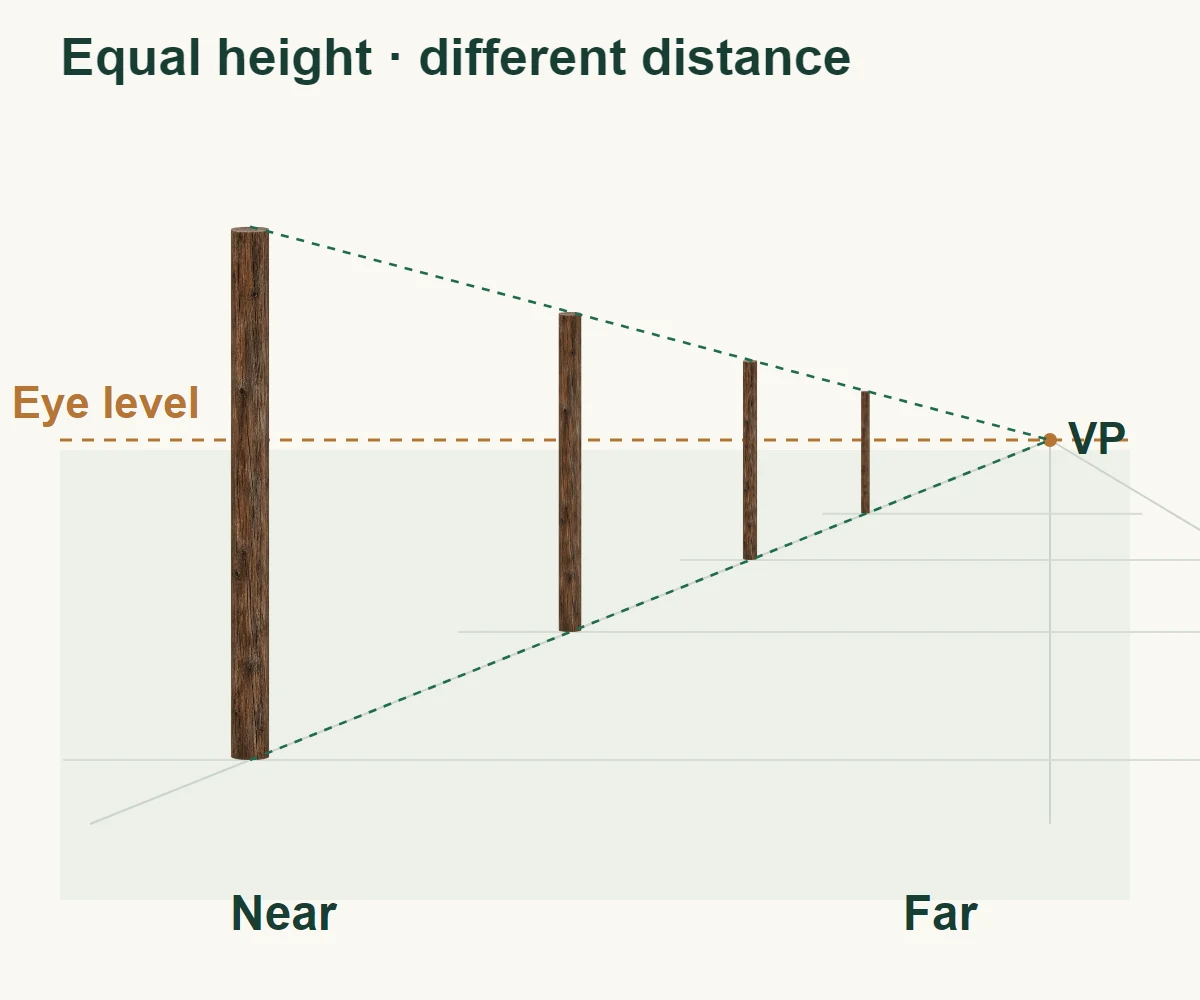
Imagine several identical upright posts on level ground. In a simple perspective view, the more distant posts appear smaller. Their tops approach the horizon as they recede, but the tops lie on the horizon only in the special case where their real height matches the viewer’s eye height.
Keep the viewpoint, ground level and apparent size consistent. The horizon belongs to the reference plane; it is not simply whichever visible edge happens to cross the scene. [3]
Our illustration deliberately omits the optical effects of the aquarium’s glass and water. Use it to understand the relationship, then judge the actual filled aquarium from the intended viewpoint rather than treat the drawing as a precise underwater projection.
Use what you learn in My Aquariums
Follow a new aquarium through cycling or see how water readings and care change over time in an established setup.
Create layers without dividing the tank into three equal strips
Foreground, midground and background describe spatial roles. They are not instructions to fill the first third with short plants, the next third with medium plants and the last third with tall plants.
A near element can frame the view. A middle group can hold the main composition. A rear detail can give the eye something to discover beyond it. The relationships matter more than exact boundaries.
Start by placing a near form and a farther form with a visible gap between parts of their outlines. Move them until there is both overlap and a route into the scene. If they do not overlap at all, they may read as separate objects in a row. If the near form hides the farther one completely, the second layer no longer contributes from that view.
Avoid accidental tangencies
In the front-view sketch, check whether the edges of two unrelated forms just touch. A branch ending exactly on the outline of a rock, for example, can make the relationship difficult to read. Test a small overlap or a clearer gap instead.
Pieces may need to touch for stability. Check whether their outlines make the arrangement clear from the front, and keep any adjustment structurally safe.
Coordinate sizes instead of scattering small details
Forced perspective is strongest as a coherent design intention. If the rear represents a more distant area of the same landscape, smaller physical details can support that interpretation. If the rear contains an exceptionally broad leaf or a conspicuous large-grained material, it may instead become a new near-looking reference.
ADA’s driftwood guidance uses larger pieces nearer the front and smaller pieces toward the back as a depth technique. In your own layout, compare the apparent outlines from the main view as well as the actual material sizes. [4]
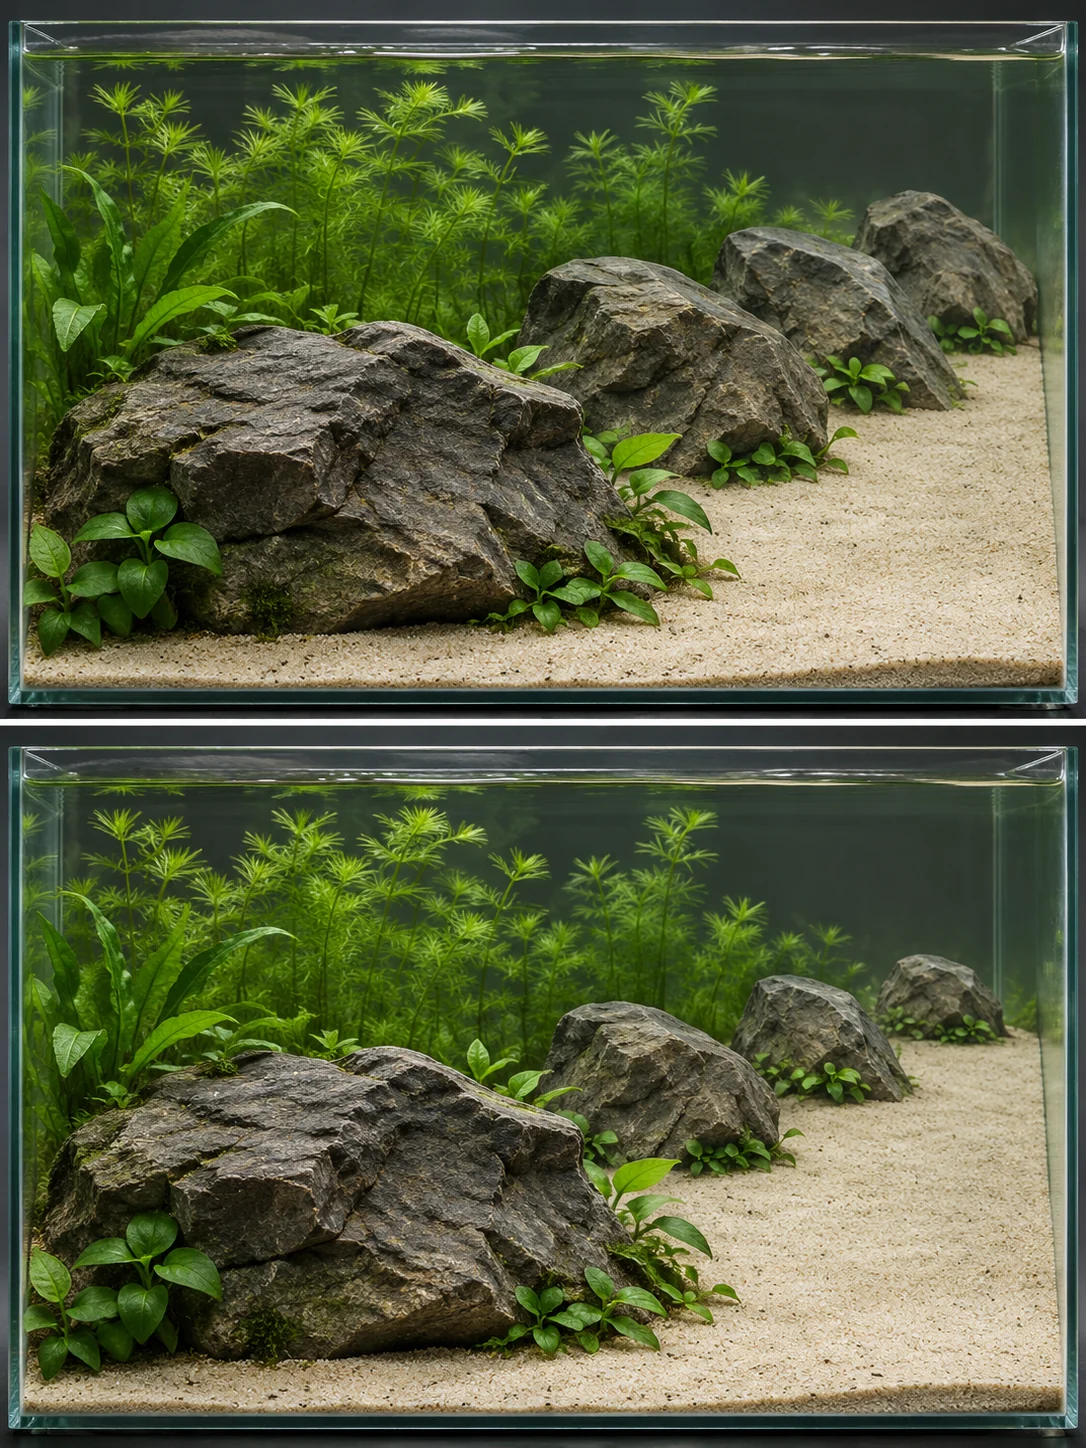
There is no universal percentage by which every rear rock must shrink. The available depth, desired scene, viewing position and the recognizable features of the objects all affect the result.
Keep material character consistent enough for the intended relationship. Three smaller stones with a completely different texture may read as a different type of object rather than more distant versions of the foreground group. Sometimes that contrast is intentional; sometimes it weakens the illusion.
A useful test with one material family
Select a main piece and a few supporting pieces with related texture. Arrange them at different distances, then inspect the front view. Change only the size of one supporting piece. Compare whether the scene now reads as more distance, a different object, or simply less detail.
Changing one piece at a time makes it easier to see what improves the view.
Use substrate elevation to reveal, not merely to raise
A rising substrate can make rear planting and hardscape visible above foreground obstructions. Tropica describes a rearward slope as one way to support depth in a layout. Its product-specific substrate instructions should not be treated as a universal construction recipe for every aquarium. [5]
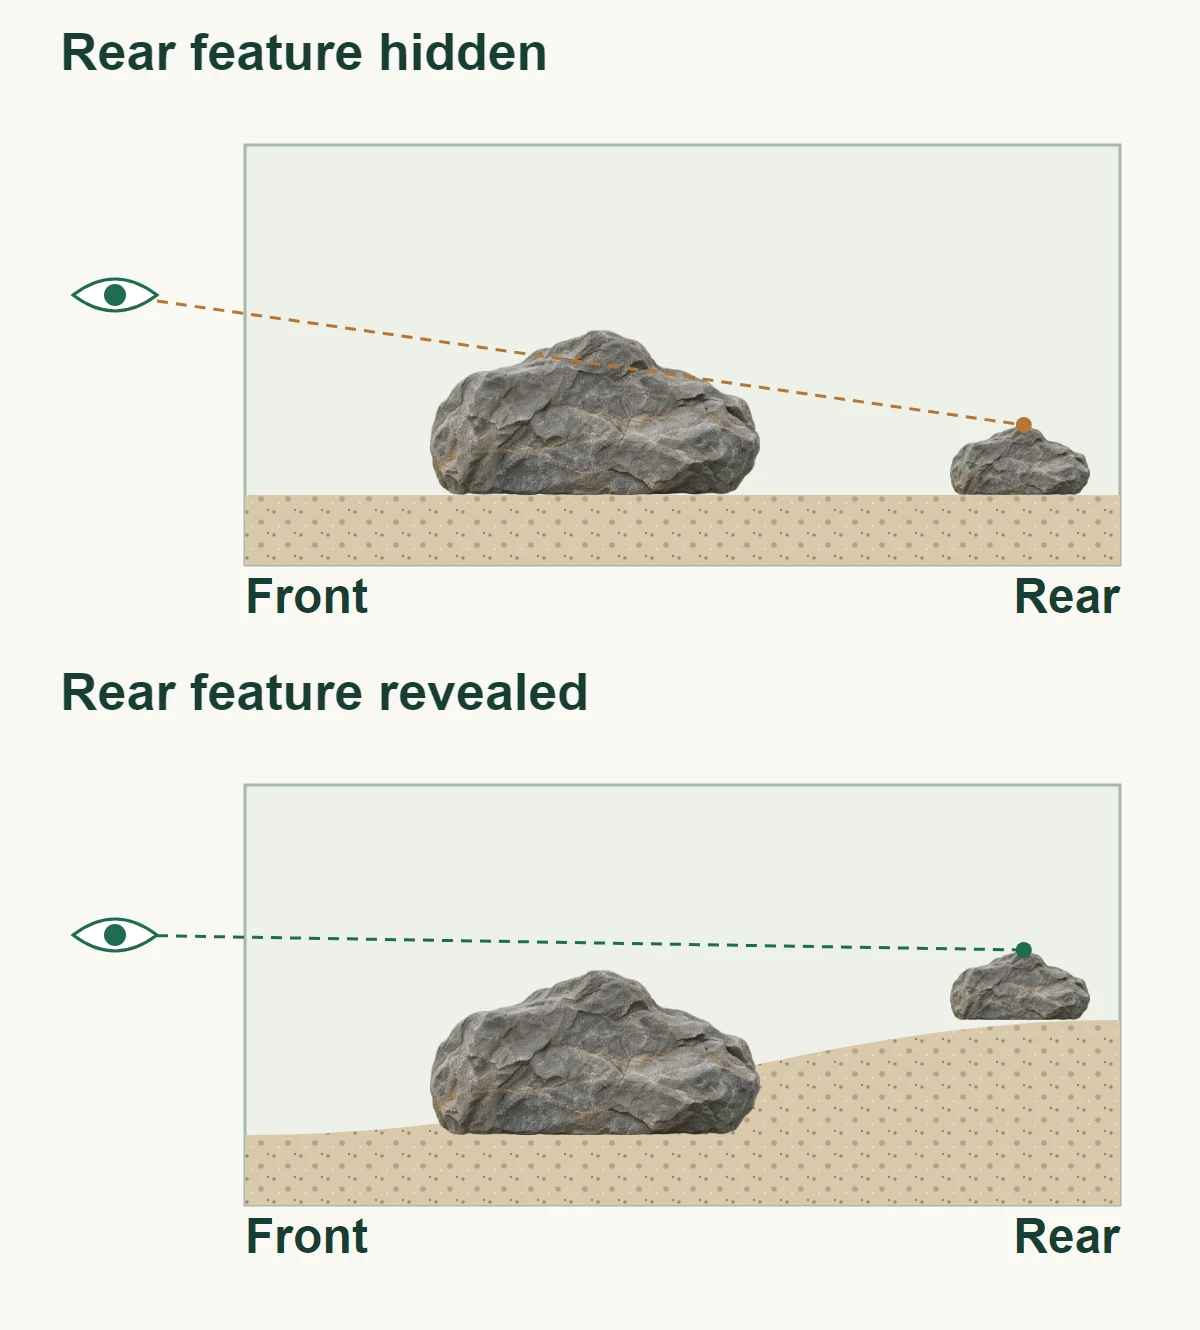
Before deciding on the slope, draw a side profile. Mark the eye position, the height of the foreground obstruction and the rear feature you want to see. Ask whether raising the rear actually reveals that feature—or simply produces a higher planted wall.
A very high rear area also consumes space and requires appropriate support. Keep load-bearing structures stable and follow the tank and material manufacturers’ instructions. Do not rely on loose sloping grains alone to secure heavy stones.
The soil, sand and hardscape lessons cover material decisions. Here, elevation is a means of controlling visibility, not a target number of centimeters.
Make leading lines lead somewhere
A line can be an actual edge—the side of a sand path—or a sequence of related forms. In both cases, decide what the line reveals at the end or around its bend.
A path can narrow toward the back to reinforce a suggestion of distance. In a physical aquarium, you may deliberately taper it more than its real length would naturally suggest. Check how much taper looks convincing from your chosen viewpoint.
ADA’s “Fine Summer Breeze” layout uses a sand opening and stones that guide attention toward the rear. It also pairs different leaf sizes to strengthen depth. These are complementary choices in that particular aquarium, rather than a requirement to add a sand path to every layout. [6]
Avoid turning a path into a ruler-straight strip merely because the perspective guide is straight. Your intended scene may benefit from an irregular edge or bend. What matters is whether the route remains legible from the main view.
Check the path from the front, not only from above
Draw the route in plan view, then look at it through the front of the tank. Can you see enough of its changes in direction to understand it as one route? Does a plant or stone accidentally divide it into unrelated patches?
A path that disappears partly behind a form can imply continuation. One that disappears immediately behind the first object may never establish its direction. Test the distinction with a photograph rather than assuming either arrangement is always better.
Use plants to reinforce the intended scale
Choose planting by its visible role, not just its eventual height. Leaf size, branching, group density and the shape of the maintained outline all influence how much space the planting seems to occupy.
For a miniature landscape, compare the leaves with the hardscape features they sit beside. A plant may be botanically small but visually oversized next to a miniature tree trunk. A larger aquarium or a less literal composition may use that same plant successfully.
Do not convert “smaller leaves toward the back” into an absolute rule. The Dutch-style guide and aquarium styles overview offer other ways of organizing planted compositions. Your intended result determines whether an exaggerated landscape scale is appropriate.
Use the midground plants guide for transitions and the background plants guide for rear groups. In a small tank, the nano midground lesson is a more focused starting point.
Treat contrast and lighting as supporting choices
Compare the focal opening with the areas around it. A very bright rear feature can become a focal point in its own right; a uniformly dark rear wall may conceal the separation you intended. Neither “bright in front” nor “dark at the back” is a universal depth formula.
Use the aquarium’s actual lighting to inspect the arrangement before final planting where practical. Look for shadows that hide a key opening and glare that makes a surface dominate. Do not increase light simply to make a design look deeper; lighting decisions also have to suit the planting and system.
The lighting guide and Lighting Calculator can help with the plant-light planning. The visual evaluation still needs to happen at the real tank.
A worked depth-planning exercise
Imagine a 60 × 30 × 36 cm aquarium, approximately 24 × 12 × 14 inches. Use these example dimensions to plan the view and access; choose livestock separately for its care and space requirements.
Begin with the view. Mark the eye position you normally use. Sketch a near wood group on the left and a smaller group behind it. Keep a part of the rear group visible.
Check the ground. In plan view, draw an opening that moves behind the near group rather than ending against its front. In the side view, check whether the chosen substrate profile lets you see the route.
Check the scale. Compare branch thickness and texture between the groups. Do not add a conspicuously large rear detail without deciding what it is meant to represent.
Add mature plant outlines. Draw the outline of the planting around each group at the size you expect to maintain. Move the plants that would close the opening rather than assume you will solve that problem after establishment.
Test the physical arrangement. Recreate the main decisions with the actual materials. Photograph the chosen view, then inspect from the normal secondary viewing position. Keep only the exaggeration that remains useful for your aquarium.
Preserve depth as the aquarium develops
Depth can be designed out by growth. A gap closes, an exposed branch disappears or two distinct plant groups become a single continuous mass. That does not necessarily mean the initial hardscape was wrong.
Keep a reference photograph of the shape you intend to maintain. At each review, compare the relevant boundaries: the edge of the opening, the separation between groups and the visible outline of the farther structure.
Tropica recommends adapting trimming to plant growth form rather than using the same approach on every species. In a perspective layout, apply the appropriate method to preserve the specific opening or silhouette you need. [7]
Use the plant tools guide for equipment selection. Avoid a major last-minute reconstruction simply because one overgrown group has hidden a useful layer.
Diagnose a flat-looking layout
| What you see | A possible explanation | First design check |
|---|---|---|
| A single wall of material | Near and rear outlines are not visually separated | Try a clearer overlap or a visible gap |
| A path visible only from above | Foreground forms hide its direction | Recheck the main viewing height and the first bend |
| Small rear stones that still look close | Their texture or neighboring foliage gives a conflicting scale cue | Compare the whole rear group, not the rocks alone |
| A layout that lost its depth after growing in | Plant masses have closed earlier openings | Compare with a reference photo before moving hardscape |
| A powerful front view but awkward side view | The design relies on a strongly directional illusion | Decide how much perspective exaggeration suits a multi-view tank |
Check which explanation fits what you can see before making changes. The aquascaping mistakes lesson takes a broader approach to deciding what to change and how disruptive that change needs to be.
Conclusion
Build depth by coordinating what is near, what remains visible beyond it and how the sizes and textures relate. Choose the viewpoint first, check the ground and sightlines, then include mature planting in the plan.
The goal is not the steepest slope or the largest number of layers. It is a scene whose spatial relationships remain understandable—and maintainable—in the aquarium you actually have.
💬 Join the Conversation
Which view of your aquarium feels flatter: the front, the side or a photograph? Share the view and the effect you are trying to create in the AquariumLesson Community.
Frequently asked questions
Does every aquascape need a vanishing point?
No. A simplified perspective drawing may use a clear vanishing point for a particular direction. An organic planted composition does not need every branch or stone to converge on one visible point.
Should all the miniature tree tops line up with the horizon?
No. That happens only in a special simplified case where their represented height matches the observer’s eye height on the same level ground. Consistent viewpoint and scale are the more general ideas to preserve.
Will more substrate at the back always create more depth?
No. Elevation is useful when it reveals or supports the intended arrangement. A higher rear wall can still look flat when the foreground blocks the view or every layer merges into one outline.
Can a small aquarium have a convincing sense of depth?
Yes, as a design objective. Use selective layering, a coherent scale and visible openings rather than force many tiny objects into the footprint. The illusion does not increase the actual space available for plants, animals or maintenance.
Why did my aquascape look deeper before the plants grew?
Compare the early and current outlines. Growth may have hidden a rear feature or closed a gap that previously separated the layers. Investigate the planting before assuming that the entire hardscape needs to be rebuilt.
Lesson completed!
You've finished Aquascaping Depth: Perspective, Scale & Substrate Slopes. Continue learning or put this guidance into practice.
Continue learning →References
[1] DOOA / Yusuke Homma — SUIKEI WORDS 05: Techniques to make small layouts look bigger. Accessed November 2, 2026.
[2] University of Delaware, Art Foundations — Linear Perspective. Accessed November 2, 2026.
[3] MIT / Antonio Torralba, Phillip Isola and William T. Freeman — Foundations of Computer Vision, Chapter 42: Single View Metrology. Accessed November 2, 2026.
[4] Aqua Design Amano / Yusuke Homma — SUIKEI WORDS 02: Layout composition – Driftwood. Accessed November 2, 2026.
[5] Tropica Aquarium Plants — Hardscape and substrate. Accessed November 2, 2026.
[6] Aqua Design Amano — Nature in the Glass: Fine Summer Breeze. Accessed November 2, 2026.
[7] Tropica Aquarium Plants — Trimming. Accessed November 2, 2026.
Aquascape illustrations created with AI; technical diagrams by AquariumLesson.