

Aquascaping Guide: Design, Layout, Styles & Techniques
Introduction
Aquascaping is the deliberate arrangement of plants, rocks, wood and open space inside an aquarium. A successful layout gives those elements a relationship: a place for the eye to settle, a direction to follow and enough room for the aquarium to develop without losing its shape.
You do not need a competition tank, an expensive equipment list or a complicated composition to begin. You need a plan that fits your aquarium, the plants you can grow and the care you are willing to provide. Start with the aquarium’s dimensions, then work through the layout, planting and ongoing care.
Sketch the main groups and open spaces before choosing individual plants or materials.
What you’ll learn in this lesson
- How to turn an idea into a practical aquascape plan.
- How composition, depth and style affect different decisions.
- How to choose hardscape and plants without buying everything first.
- How to keep the design workable as plants grow and maintenance becomes routine.
What is aquascaping—and what is it not?
Aquascaping is the design part of aquarium keeping. It concerns how the aquarium looks and how its living and non-living elements fit together. Aquarium keeping also involves biological filtration, water quality, animal welfare and the daily operation of the system. A layout needs both disciplines, but a pleasing arrangement cannot substitute for a properly established aquarium.
A planted aquarium does not have to imitate mountains or a forest. A carefully arranged garden of aquatic plants is also an aquascape. Equally, a landscape illusion is not automatically a biotope: recreating a specific habitat requires a different kind of research and species selection. Our aquarium styles guide explains those distinctions.
If this is your first aquarium, use the beginner aquarium guide alongside this lesson. Here, we concentrate on the design decisions rather than repeat the full setup and cycling process.

Plan the aquarium before planning the picture
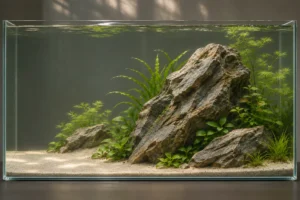
Begin with the tank you will actually use. Write down its length, front-to-back depth and height, the main viewing position, and where equipment must fit. A narrow tank and a deep tank can have the same volume but give you very different space for layering materials.
Then describe the result in one sentence. “An open planted aquarium with a wood group on the left and room to see the fish” is a useful brief. “A dramatic nature aquarium” is harder to act on because it leaves almost every decision unresolved.
Tropica specifically recommends drawing the locations of both hardscape and plants during planning. Sketch the planting with the hardscape so you can see how they will fit together. [1]
Write a small design brief
| Decision | Write down | Why it helps |
|---|---|---|
| Main view | Straight on, from a sofa, or from two sides | Establishes the view that the layout should explain most clearly |
| Main impression | Open valley, planted island, leaning wood group, or plant garden | Gives you a direction without locking you into a rigid formula |
| Plant approach | No injected CO₂, or a managed CO₂ system | Narrows the planting choices and equipment decisions |
| Maintenance | Tasks you can realistically repeat | Prevents a design built around access you do not have |
| Animal requirements | Appropriate space, shelter and swimming areas | Keeps the composition subordinate to the animals’ needs |
| One protected space | An opening, a low foreground, or a clear view behind a branch | Identifies the feature you must preserve as the tank develops |
Use the Aquarium Planner to organize the setup. For a small footprint, the nano aquascaping guide develops the same process at a tighter scale.
Use what you learn in My Aquariums
Follow a new aquarium through cycling or see how water readings and care change over time in an established setup.
Choose a composition before arranging individual pieces
Composition is the distribution of the main masses and the spaces between them. Before worrying about a small stone or a particular stem plant, decide where the visually heavy parts of the aquarium should be.
ADA describes triangular, convex and concave compositions as basic Nature Aquarium arrangements. Treat these as starting shapes, not as the only valid ways to build a tank. [2]
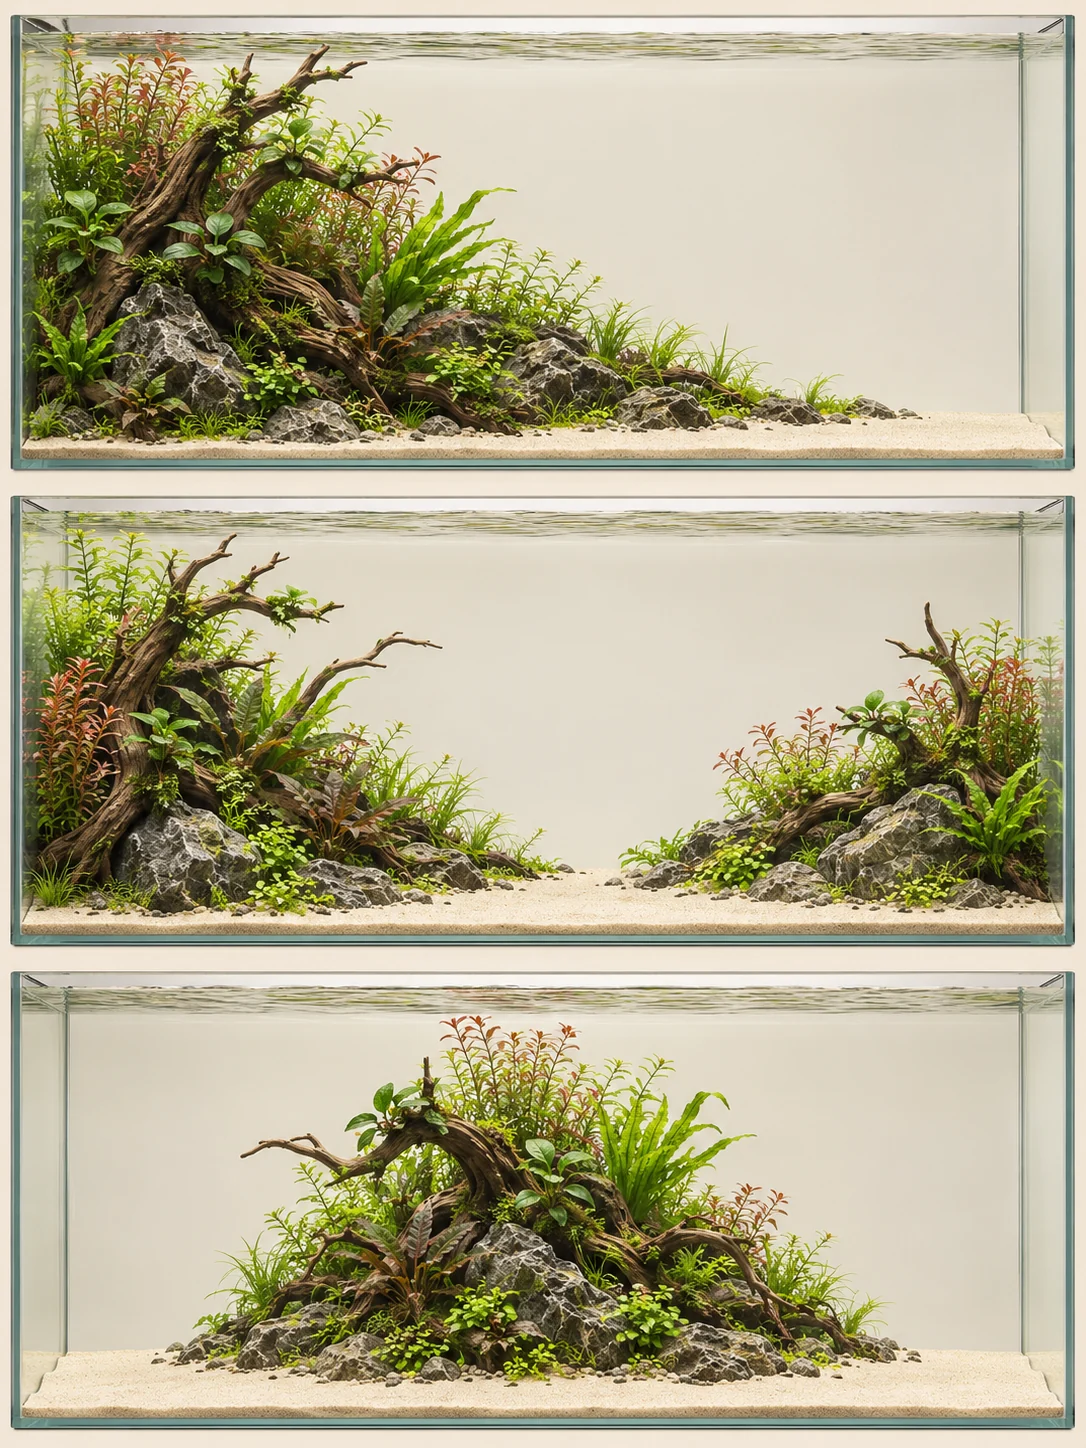
A triangular arrangement moves from a higher mass on one side toward a lower opening on the other. A concave arrangement places larger masses toward the sides and leaves a lower opening between them. A convex or island arrangement concentrates the main group within surrounding space.
Choose one shape and sketch only its silhouette. Do not draw leaves yet. Ask whether the main group is distinguishable and whether the open area has a clear purpose. If the sketch is difficult to read, adding more detail is unlikely to make the main decision easier.
Give the eye a place to begin
A focal area might be a stone, the junction of several branches, a contrasting plant group or the opening between two masses. It does not have to be a single object, and it does not always have to sit off-center.
For a first design, choose one primary focal area and make the surrounding elements support it. You can add secondary points of interest once the main arrangement is clear. A small bright accent can compete with a larger dark mass, so assess what attracts attention rather than simply compare the sizes of the objects.
The aquascaping design principles lesson explains focal points, negative space, balance, the rule of thirds and the golden ratio in more detail.
Build depth through relationships, not just a steep slope
Depth is the impression that the composition continues away from the viewer. Raising the rear substrate is one possible tool, but it is not the whole method. An opening that leads behind a foreground group, overlapping forms and a deliberate change in material size can all contribute.
As one practical example, ADA demonstrates larger-leaved planting in front of finer-leaved planting to reinforce depth. Look at how the neighboring groups work together; smaller leaves at the rear are one option, not a requirement. [3]
Try separating your sketch into three spatial roles: a near framing element, a middle group that carries the main idea, and something visible beyond it. They do not need to occupy equal strips of the tank. A foreground opening can be more useful than a solid foreground planting band.
Before committing, check the layout from your intended eye level. A route visible from above may disappear behind a stone when viewed through the front glass. For an explanation of viewing height, overlapping forms and forced perspective, continue to aquascaping depth and perspective.
Use styles to clarify your direction
A style gives you a set of priorities. It should help you make decisions, not pressure you into copying a famous aquarium or buying materials that do not suit your situation.
| Direction | Start with this question | Existing lesson |
|---|---|---|
| Nature Aquarium | How can the planting and hardscape suggest a coherent natural scene? | Nature aquascaping |
| Iwagumi | Can a restrained arrangement of stones carry the composition? | Iwagumi guide |
| Dutch | Can plant groups, contrasts and their arrangement carry the design? | Dutch-style aquariums |
| Diorama | What landscape and scale is this miniature scene intended to suggest? | Diorama aquascaping |
| Biotope | Which specific habitat are we representing, and what supports that choice? | Biotope aquarium guide |
You can also build a planted aquarium without declaring a style. The useful test is whether the choices work together and remain suitable for the aquarium’s inhabitants.
Choose and test the hardscape
Pick the main piece for its role in the planned composition. Look at its outline, direction and contact points, not just whether it looks attractive in isolation. A branch that looks dramatic on a shop shelf may cover the opening you intended to keep clear.
Start with a dry arrangement of the main pieces, following the tank and material manufacturers’ guidance on support and safe use. Check that structures are stable and that maintenance will not require moving load-bearing pieces. Material suitability, including possible effects on the water, belongs in the aquarium rocks guide and driftwood guide.
Photograph the arrangement from your intended viewing position before making changes. Keep two or three variations rather than relying on your memory of the previous version. You are comparing arrangements, not searching for a mathematically perfect position.
Plan substrate by function
Mark where rooted plants will grow, where you want open sand and where elevation is genuinely useful. An open path is not a compulsory aquascaping feature. It is another surface that needs to fit the layout and be accessible for care.
Use the aquarium soil guide and aquarium sand guide for substrate selection. Do not apply a universal front-to-back depth recipe to every tank: the planting, materials, support and intended shape must be considered together.
Our hardscape lesson covers the materials and construction decisions that sit behind this stage.
Choose plants for the shape they will become
A newly planted aquarium can be misleading. Small portions leave a great deal of empty space; established groups occupy much more of the composition. Plan the intended mature outline of each group before deciding how much variety to buy.
Give every group a role: a low foreground, a middle transition, a background mass or an attachment to the hardscape. These are design roles, not permanent labels that fit every tank size. A plant used in the foreground of a large aquarium might dominate the middle of a much smaller one.
| Plant decision | Ask before buying |
|---|---|
| Leaf size | Does its texture fit the impression and scale I want? |
| Group size | What part of the hardscape or opening will it cover when established? |
| Growth habit | Will it spread, form a rosette, branch from stems or grow along a rhizome? |
| Conditions | Can my light, carbon supply and care support it? |
| Access | Can I trim or thin this group without dismantling the layout? |
Start with the aquarium plants guide, then use the midground, background and carpeting plant lessons for the relevant roles. The Plant Database gives you a place to check individual plants and their care needs.
Avoid treating a species list as a finished planting plan. Position, group size and the outline you maintain are part of the design too.
Match low-tech or high-tech equipment to the planting
Choose the plant approach before choosing the most powerful equipment. “High-tech” is not a quality rating for the composition, and an injected CO₂ system does not make every plant or layout automatically easy.
For an aquarium without injected CO₂, build the design around plants and expectations suited to that approach. The no-CO₂ planted tank lesson and low-tech lighting guide are the relevant starting points.
For a CO₂-injected setup, use the CO₂ system guide and lighting guide together. Keep the desired planting, distribution of light and ongoing care in the same decision rather than treating them as independent purchases.
The Lighting Calculator can support the planning discussion. Treat its estimates as planning guidance rather than measurements from your finished aquarium, especially where hardscape and planting create shade.
Turn inspiration into your own plan
When you find a layout you like, identify what you like about it before listing the materials. Is the appeal a large open area, an arch, a single dominant stone, or the contrast between fine and broad foliage? That is the transferable part.
Then compare the reference with your tank. A scene designed for a deep aquarium cannot simply be squeezed into a narrow footprint while keeping every layer. Keep the main idea and remove or redesign the parts that depend on space you do not have.
A worked planning example
Imagine a rectangular aquarium with a main viewing position directly in front. You want a wood-led arrangement that feels open rather than densely planted. Use this imagined layout to work through the decisions before choosing materials.
Place the principal wood group toward one side and draw an opening that remains visible beside it. Sketch the expected mature planting behind and around the group. Move any plant mass that would close the opening. Finally, mark the equipment position and the route your hand or tools need to reach the rear glass.
Before buying plants, mark the main mass, the opening, the plant heights and the areas that need to stay accessible.
Check common aquascaping mistakes before filling
The most useful checks are questions, not a list of banned shapes. Is every object trying to be the focal point? Does the proposed planting hide the feature you selected? Can you reach the sand and glass? Is the layout being judged only from above?
A flat substrate, centered focal point or large stone is not automatically a mistake. It becomes a problem when it works against the result you want or the care the aquarium needs. Our aquascaping mistakes guide helps separate those cases and choose a proportionate correction.
Before adding animals, follow the cycling lesson and species-specific requirements. An aquarium can look finished before its biological filter is ready for livestock.
If you are working toward a final image, use the layout-to-final-photo workflow to connect plant development, maintenance and camera preparation. It keeps the photograph tied to an aquarium you can continue caring for.
Consider contests before publishing your layout
Entering a competition is optional. It can give your project a useful goal, but it should not dictate every home aquarium’s design.
If a contest interests you, check its category, eligibility and publication rules before sharing the finished layout. Different contests can impose different conditions. The aquascaping contests guide separates those entry decisions from general design advice and points to the official rules.
Maintain the composition, not just the water
Decide what you will preserve at each maintenance session: the open route, the visible branch junction, the outline of the main plant group or the separation between two textures. This gives trimming a purpose beyond making every plant shorter.
Different growth forms need different treatment. Tropica’s trimming guidance distinguishes stems, rosettes, runners and rhizomes; do not treat every plant as a hedge that can be cut across the top. [4]
Keep occasional photographs from the same position for your own comparison. Look for changes in the silhouette and the protected spaces, not merely the amount of growth. Use the plant tools guide for appropriate maintenance tools and the water-change guide for routine care.
Conclusion
Start with the aquarium’s dimensions and a clear design brief. Choose the main masses, preserve useful open space and plan plants at their intended mature size. Test the arrangement from the view that matters, then select materials and equipment that support it.
A strong first aquascape does not need every technique. It needs a few decisions that work together—and a maintenance plan that keeps them working.
💬 Join the Conversation
What is the one feature you want people to notice in your aquarium: a stone, a wood group, the planting or the open space? Share your setup and the decision you are working on in the AquariumLesson Community.
Frequently asked questions
Do I need injected CO₂ to start aquascaping?
No. You can build a planted aquascape without CO₂ injection. Choose the planting and expectations for that system rather than assume that every reference layout will behave the same way without its original equipment.
What is the easiest aquascaping style for a beginner?
There is no single easiest style independent of the plants and care involved. For a first project, we recommend a readable arrangement with a manageable planting plan and generous maintenance access. A simple-looking competition layout can still be demanding to maintain.
Should I design the hardscape or choose the plants first?
Develop them together. Select the main structural direction, then sketch the mature planting before locking the materials into place. This helps avoid a hardscape that only works while the plants are very small.
Does an aquascape need a carpet or a sand path?
No. Both are optional design choices. An open foreground, scattered planting or another deliberate arrangement may suit your aquarium better. Choose the surface for its role and its care requirements, not because it appears in many reference images.
How long does it take for an aquascape to look finished?
There is no reliable universal deadline. Different plants establish and develop at different rates, and the starting material and conditions matter. Plan around observable progress and the actual health of the aquarium rather than a promised number of weeks.

Lesson completed!
You've finished Aquascaping Guide: Design, Layout, Styles & Techniques. Continue learning or put this guidance into practice.
Continue learning →References
[1] Tropica Aquarium Plants — Hardscape and substrate. Accessed November 2, 2026.
[2] Aqua Design Amano — Nature Aquarium Starting from Zero. Accessed November 2, 2026.
[3] Aqua Design Amano — Nature in the Glass: Fine Summer Breeze. Accessed November 2, 2026.
[4] Tropica Aquarium Plants — Trimming. Accessed November 2, 2026.
Aquascape illustrations created with AI.